
We continue our series on 4x4 lighting setups and how to get the best bang for your buck.
Welcome to the second part of our series where we break down the essentials of 4x4 lighting. We cover key concepts such as colour temperature, mounting and care, while pointing out a few key accessories that’ll help you build a reliable, adaptable setup. But before we get into it, if you missed the first part of this article, you can catch up here.
Understanding colour temperature
Colour temperature, measured in kelvin (K), refers to the ‘colour’ of the light emitted. Cooler lights, with higher kelvin ratings (5000–6500K), produce a crisp, white-blue light that mimics daylight. They’re excellent for clear nights, offering sharp contrast and detail, making it easier to spot hazards such as wildlife or washouts.
Warmer lights, sitting around 3000–4500K, emit a yellowish hue. This colour cuts through fog, rain and dust far more effectively than cooler light, making it a better choice for challenging weather or dusty conditions. If you find yourself often getting sore eyes at night, a warmer colour temperature will typically be easier on the eyes as well.
Colour temperature used to be a ‘get what you get’ kind of affair, but these days as light outputs reach the practical limits of usability it’s starting to become more of a hot topic. Some brands are still locked to a specific temperature while others give you the choice at purchase time between a cool light (typically 5700K) to a warm light (typically 4000K).
Mounting your lights: position matters
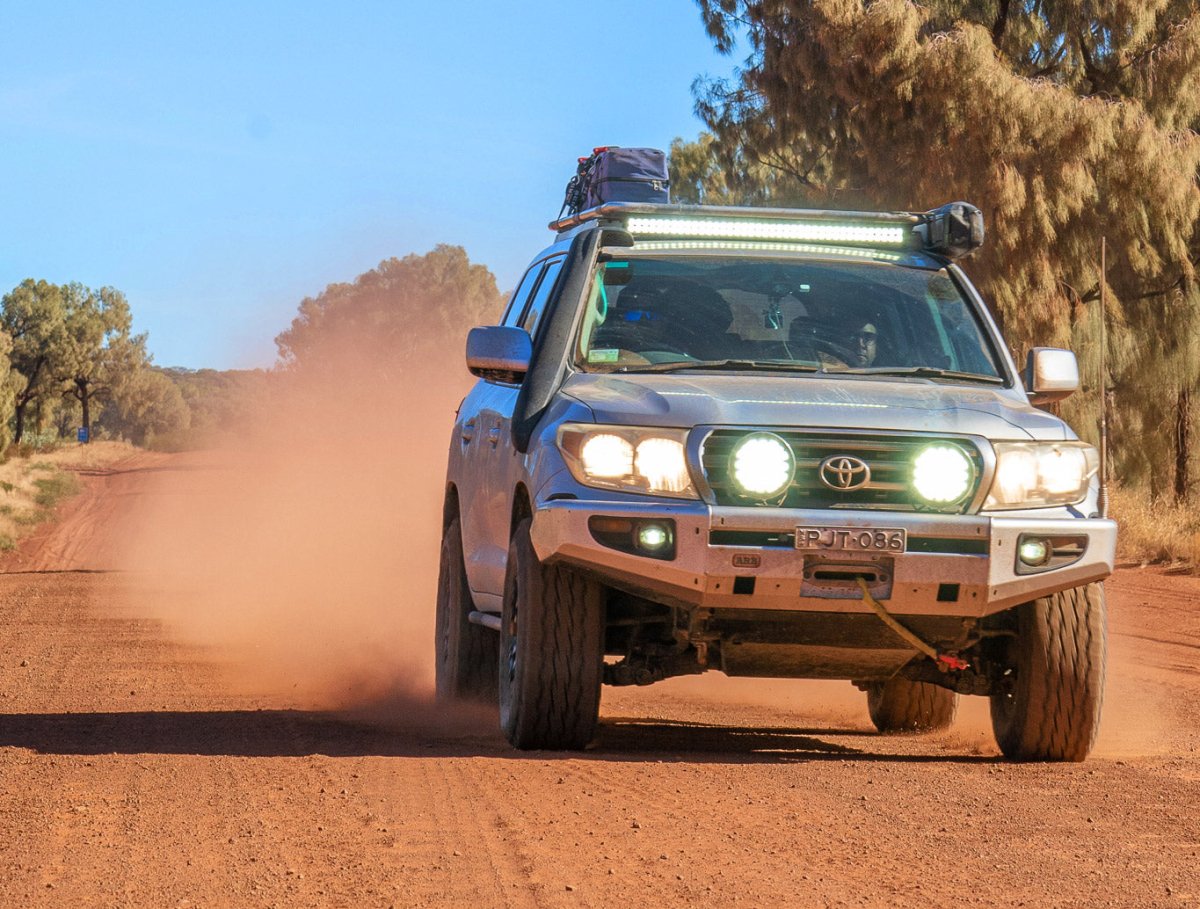
Where you position your driving lights significantly affects their performance and usability. The front bumper or bull bar is the most common mounting spot, offering clear forward projection without reflecting light off your bonnet. Most bull bars are typically set up to run a pair of either 9in or 7in driving lights, so this is where you’ll get the majority of your lighting grunt on your 4WD.
Roof-mounted lights can provide better depth perception due to the higher angle and wider coverage but may cause glare if not positioned correctly. If you opt for roof mounts, a matte bonnet wrap or deflector can help reduce reflections. To keep roof heights down and wind noise to a minimum people typically opt for a slimline LED light bar on the roof rack, something like the Raptor 40in LED light bar.
Behind-the-grille setups offer a sleek, protected option and mean you can get some lumens punching down the track before you even look at a bull bar or roof rack, but they may slightly restrict light output due to the grille’s obstruction. Each position comes with trade-offs, so consider what works best for your vehicle and driving style.
No matter what style of light you decide on, it’s important to look for adjustable mounts. Depending on loads, suspension setups and whether you’ve got a caravan or camper on the back, can drastically change how you want your lights orientated.

Durability: built to survive
Driving lights face tough conditions, from bone-rattling corrugations to relentless outback dust. A high ingress protection (IP) rating is essential for keeping out dust and water. Look for IP67 or higher, which ensures your lights are dust-tight and can handle temporary immersion in water. This is especially important for river crossings or heavy rain.
Shock and vibration resistance is equally important. Quality lights will feature durable housings and secure mounts that withstand the relentless vibrations of outback corrugations. Over time, lesser-quality lights can shift or fail under pressure, leaving you with misaligned beams, cracked mounts — or worse, no light at all. Heat dissipation is another factor to consider, as overheating can damage LEDs. Aluminium housings with built-in heat sinks are a common feature in premium models and help extend the lifespan of your lights.
Installation and maintenance
No lighting setup is complete without a reliable wiring system. Always use durable switches and harnesses that are easy to install and designed to handle the high current demands of auxiliary lights. Proper relays and fuses are crucial to protect your 4WD’s electrical system, especially when running powerful lights.
If you’re installing the lights yourself, always disconnect the battery first. Secure all wiring to avoid heat or abrasion damage, and ensure connections are watertight. Testing your lights before heading off on a trip might seem obvious, but it’s an easy step to overlook and can save you headaches later.
Like any piece of offroad gear, driving lights need regular care to perform at their best. Clean lenses often to remove dirt, bugs and dust that can reduce brightness. Inspect seals and housings for cracks or signs of water ingress, especially after tackling tough tracks. If picked up early, it might be the difference between ordering a new seal or ordering a new light. Vibrations can loosen mounts over time too, so check bolts periodically to keep everything secure. It might seem like simple things but taking a few minutes to maintain your lights every few months can ensure they last through years of adventures.
Final thoughts
Upgrading your driving lights isn’t just about throwing lumens down the track — it’s about tailoring your setup to suit your adventures. Across the different brands we stock through A247 we’ve got plenty of examples of what to look for in terms of beam performance, durability and versatility, but the principles we’ve talked about apply across the board. Pairing quality lights with reliable accessories, mounts and switches, creates a system that’s ready for anything the tracks throw at you.
Whether you’re exploring local tracks or crossing the country, a well-thought-out lighting setup lets you safely keep going long after the sun goes down. Take the time to understand your needs, choose gear that’ll last and enjoy the confidence that comes with seeing every obstacle before it becomes a problem.


